Kruptos2 Professional allows you to create encrypted email attachments so you can email your sensitive documents to anyone who has a Windows based computer. Your recipients do not need to have Kruptos 2 Professional installed all they need is the correct password to gain access to your shared documents.
Kruptos 2 Professional encrypted attachments utilise the same power behind self-extracting files so you can be sure your files are secure.
Creating Encrypted Email Attachments using Windows Explorer
1. Open windows explorer (Windows key + E)
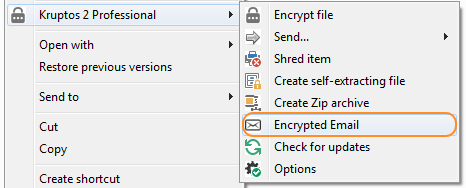
2. Select the files and folders you want to destroy and choose Kruptos 2 Professional | Encrypted Email
3. Enter your password, password hint and a name for the email attachment
4. Click the browse button and navigate to the folder where you would like to save your encrypted attachment
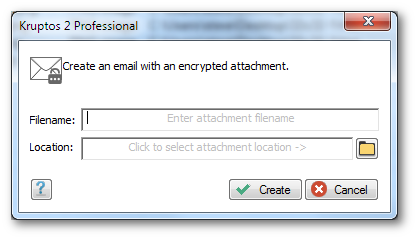
5. Click the Create button
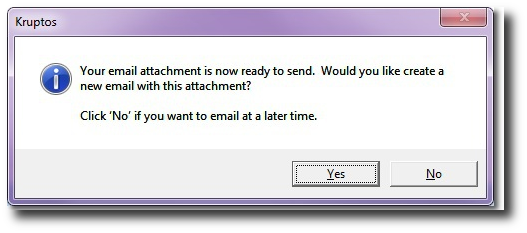
6. Your encrypted attachment file will now be created. You can now choose to attach your encrypted attachment to new email or to attach later. If you choose to attach now Kruptos 2 Professional will attempt to open your default email client and create a new email with the attachment.
Note if you use a web based email client: a) Select No – send email a later time
b) Open your webmail client and create a new email
c) Add the encrypted attachment to your email.
d) Send
Creating Encrypted Email Attachments using Kruptos 2 Projects
1. Start Kruptos 2 Professional
2. Add your files to your project or open an existing project
3. Click the Email button on the Toolbar

4. Enter your password, password hint and a name for the email attachment
5. Click the browse button and navigate to the folder where you would like to save your encrypted attachment

6. Click the Create button

7. Your encrypted attachment file will now be created. You can now choose to attach your encrypted attachment to new email or to attach later. If you choose to attach now Kruptos 2 Professional will attempt to open your default email client and create a new email with the attachment.
Note if you use a web based email client: a) Select No – send email a later time
b) Open your webmail client and create a new email
c) Add the encrypted attachment to your email.
d) Send
Using Encrypted Email Attachments
Encrypted email attachments contain a Zip file which in-turn contains an encrypted self-extracting file. To use and extract the contents of an encrypted attachment:
1. Open the attachment and then double click the self-extracting file (Alternatively you can save the self-extracting file to any destination the double click to open)
2. The following wizard will be displayed
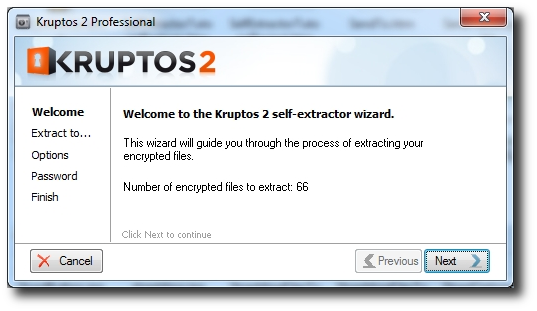
3. Click Next to continue
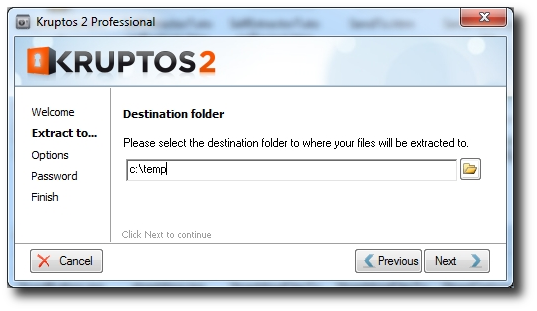
4. Enter a location to extract the contents of the Self-Extracting file to: simple click the ‘browse’ button and navigate to the desired location, then click Next
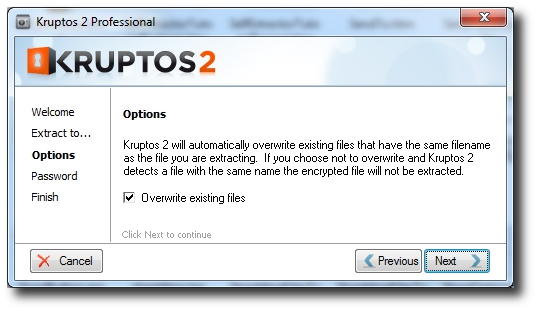
5. Choose options, then click Next
6. Enter the correct password then click Extract
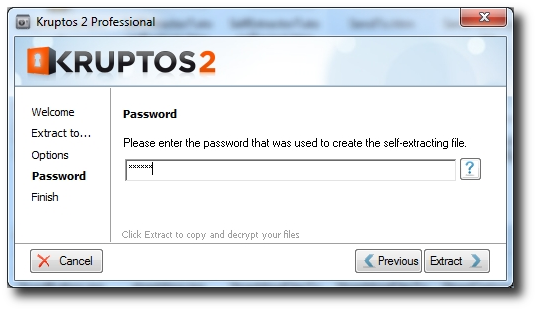
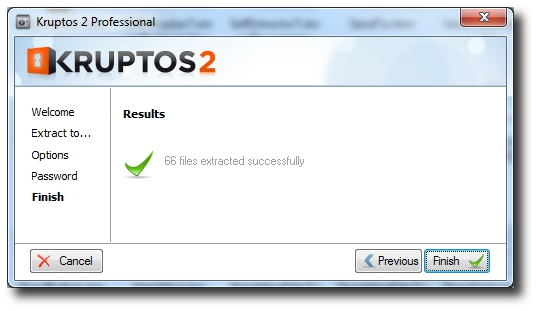
7. The contents of the Self-Extracting file will now be extracted and decrypted using the provided password.
